I don’t normally do product reviews but I had let quite a few people on Facebook (chatting on direct messenger) know that I was trying out a new brand of bacon and they wanted feedback on it, and figured what the heck, why not do a blog post about it.
I admit it, I’m a baconholic (and so is my husband). If there is bacon in the house, it doesn’t last long. If it’s cooked bacon for a recipe, Beef Stew, Risotto, Roasted Brussel Sprouts (with bacon) or pretty much any recipe calling for good diced bacon, it’s a guarantee, that ¼ of it will actually end up in the recipe and the rest is snacked on significantly prior.
It’s in my top 3 things of if I was given a choice of three foods and only three foods to live on forever, good bacon is right up there.
We have always been a fan of Nueske’s Bacon, I do have to say either what we used to get wholesale in restaurants is a different quality or the amount of time they smoke has been decreased. It’s not a knock of Nueske’s by any means, we still pay the outrageous shipping costs to get some periodically. We just happen to really like smokey bacon and it seems a bit different in the last few years.
Our other recent favorite is North Country Smoke House’s Bacon, it doesn’t hold a candle quite to Nueske’s but it’s much better than the average bacon available in the supermarkets. And it is available in our local Market Basket store, which makes me a very happy camper.
I’ve also been a long time fan of Smoke House of the Catskills (formerly Veteran Meats) their double-smoked bacon is awesome and they always seem to have sold out of it when I take a jaunt back to NY.
You know you are in bacon withdrawal when you start drooling after watching a video about making bacon. Yup, sad I know. Rave reviews on the bacon and a large following online. What the heck right?
I, of course, proceeded to go order some and was told after ordering it would be 5+ days before I got my shipment. Oakkayyy. Bacon was cheaper than Nueske’s, Shipping was cheaper (but actually not much when you factor in that it came unrefrigerated in a plain box). Nueske’s usually ships within a day or so, is shipped in a Styrofoam container loaded with ice packs so it’s guaranteed to be within food safety temps on delivery.
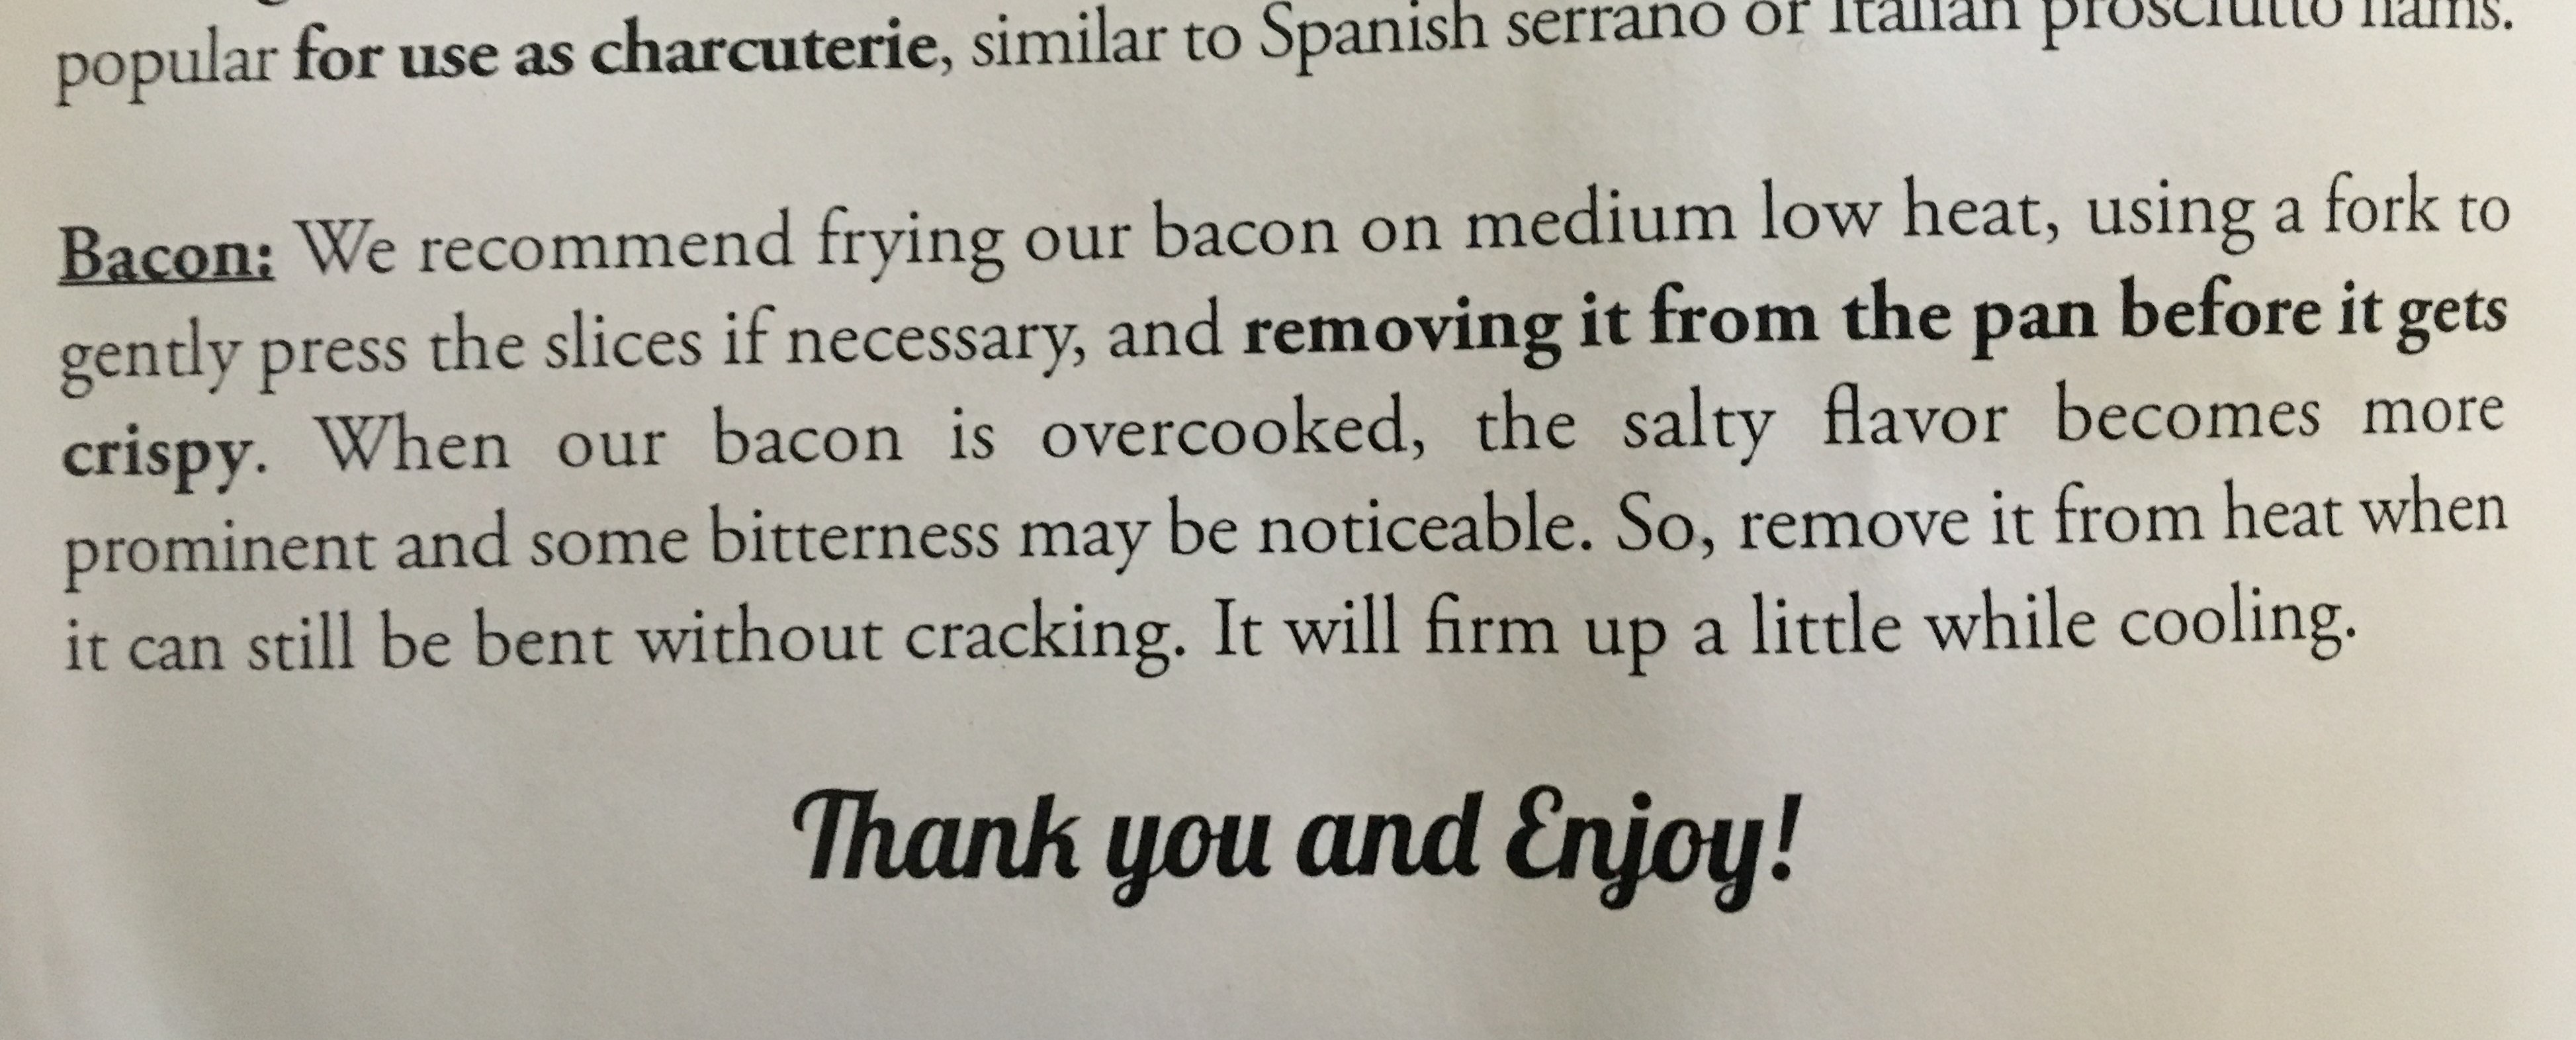
I honestly don’t think I would have ordered Benton’s if I knew upfront how it would be delivered. In their defense, they did have this on the product page, “As it is dry-cured, smoked, and vacuum sealed, it is a very flavorful and shelf-stable product that ships unrefrigerated to all US destinations, all year round. We hope you enjoy it!”
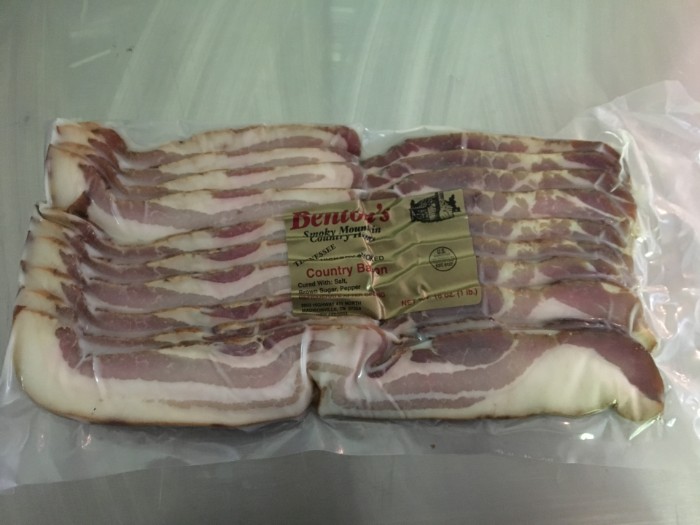
I’m just apparently one of those people that saw on the order page below the photo of lovely bacon “One order contains four one-pound packs of Hickory Smoked Country Bacon from our smokehouse and plant in Madisonville, TN. This bacon is dry-cured by hand with salt, brown sugar, and black pepper. After about three weeks curing and drying in refrigeration, it is thoroughly smoked in our wood stove smokehouse for two to three days continuously. Finally, it is packed by hand, mere feet from the smokehouse, and boxed to ship. “ And I didn’t bother to scroll down below the fold (where the notice about shipping was) and I was fixated on bacon. So I admit I missed the part about it being shipped unrefrigerated. My bad, not theirs.
The box arrived on Tuesday. The box smelled delightfully smokey, and there was a slip of paper in there talking about how because of the curing process it could be unrefrigerated. So no styro, no ice packs. $27.55 for shipping an unrefrigerated 4 lb box of bacon with ground shipping. Ouch. Not really cheaper then Nueske’s.
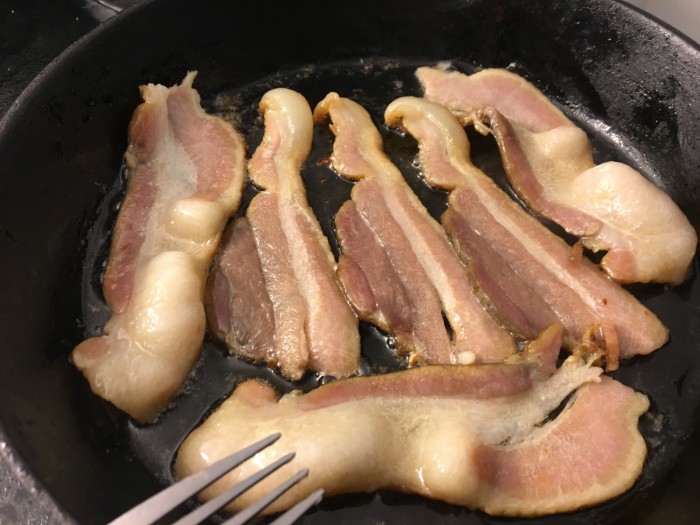
I don’t do overcooked bacon, and please note their note about overcooking it, Well done bacon is a crime against humanity and doesn’t happen in my house.
The bacon itself while cooking did not have a significant smokey odor to it which surprised me. A lot of fat rendering and the taste itself was more similar to back bacon then regular thick-sliced bacon. A kick of smokiness at the end. And quite salty.(see above note and also my note about overcooking bacon is a crime,). The muscle portion of the bacon (ie the meat) was tender and not chewy, but the fat portion was a tad chewy, a result of being salt and sugar cured.
This is not the eating alone type of bacon, whether snacking or to serve standalone as a side for breakfast. I would hesitantly (and only because I have not yet cooked with it as a complimentary ingredient to a dish) recommend it for things like frittatas, quiches or anything where the pretty decent flavor but saltiness would be tempered. We did have some on burgers last night and it was a nice match with grilled portabellas, ciabatta, and cheddar cheese. The bacon did indeed compliment the burger quite nicely.
I doubt I’ll be ordering it again though as still have 2 lbs of it which have been relegated to the freezer for the next time I make risotto and it’s nothing against Benton’s but I like my bacon snackable. After wolfing down four slices this morning which I oven baked with demerara sugar, roasted garlic and chipotle to cut the saltiness, it tasted quite delish but I’m now on my 3rd qt of water. So definitely not snackable. Have no fear Nueske’s your still #1 in my book.
Yes, this is a bit of a rant and I won’t apologize for it because this makes me quite angry, actually, it totally fries me. I work with REAL B&Bs, and yes we do encourage B&Bs to list on Airbnb, know and utilize thy frenemy so to speak. It takes less of a commission then the OTAs (Booking.com, Expedia, etc.) among other things. A REAL B&B is one that is licensed, insured and yes inspected (at least in the US) to serve breakfast, many having to take ServsafeCourses as well as having many other business licenses to operate as a legitimate business.
I have a Google alert set up for Bed and Breakfasts daily for new Bed and Breakfasts opening, B&Bs in the news, new ideas on specials and packages that I can suggest to other B&Bs, B&Bs closing, a write up about them and other things B&B related. Pretty much every damn day in my alerts, I get at least one “New B&B opening in XXX”, “Bed and Breakfast offers Unique Package to Visitors”, “Bed and Breakfast Burns to the Ground, people barely escape,” “B&B fights new zoning rules”, “Man dies at B&B when using swing, branch falls and kills him,” “Kitten B&B open in New Jersey” and on and on. I have to admit that the last one was super cute but I digress. All of these headlines are NOT about REAL B&Bs, they are about Airbnbs, which many journalists synonymously interchange these words throughout the articles as if it were the same thing.
I have nothing personally against Airbnb or the average person running a small-scale Airbnb, but the industry I work with, REAL B&Bs, are most definitely affected by it. I know way too many B&Bs that have gone out of business because they can’t compete with market and lodging saturation from local Airbnbs.
Why would someone stay at a REAL B&B if they can stay at an Airbnb for cheaper? AH HA, So they think anyway. If one adds up the costs of staying at an Airbnb, plus Airbnb fees, plus cleaning fees, it is generally comparable to what the local B&B costs for the same type of room, but a real B&Bs costs already include those cleaning fees and amenities built-in, plus you get breakfast. AND if you break a leg going down those pocket stairs in the back, they do have liability insurance to cover it (Unlike most Airbnbs).
Not even going there about Airbnbs serving food, aside from the fact that you go to an Airbnb and get deathly ill, do you think their insurance will cover it? Probably not. Enough said (for now). From a long history of food service on my end, I’d get up in arms if a local place opened up its door and called itself a café, but had no inspections, no visits from “the Man”, no legal venue to serve food at. I’d have a cow.
Grandma renting out her spare room because she needs to supplement her Social Security, good for her! Parents renting out their son’s room to help pay off college tuition, I get it! Landlords taking whole rental properties off the regular housing market, in Seattle for instance, I found one apartment building with over 50 units, all renting them out on Airbnb. No, definitely no! For those out there that think Airbnb is the next best thing after sliced bread, ever have a discussion with someone looking for a long-term house rental in New Orleans or Toronto? Please do! It’s very enlightening.
I could go on about the unfairness of REAL B&Bs having to pay all of the things that a regular business has to pay, regular taxes, inspection fees, liability insurance, advertising, having to pay for business taxes including a an actual website to advertise, commissions to the OTAs, ridiculous website accessibility lawsuits, etc, but that’s not the point, it’s that many journalists are helping blur the line and spread the misconception that an Airbnb is the same exact thing as a REAL B&B.
It springs to mind a conversation I had with a friend fairly recently, she had just come back from traveling to the Hudson Valley in New York state. “Oh we stayed at this lovely Bed and Breakfast in the Upper Valley! It was so cute, the lady had a couple of small children who were really sweet and she made this fantastic sausage frittata for us the day we left”. “Which B&B?” I asked, as I know many of them there but none sprang to mind where the innkeeper’s small children were underfoot. “Oh I don’t know, she didn’t have a name, we found her on Airbnb.” It was (after looking it up because I was curious) an actual Airbnb, not a B&B, but my friend didn’t know it wasn’t the same thing, we had a rather lengthy conversation after that about the differences.
Ironically she went on to say that as they were driving back to Pennsylvania, both she and her husband got quite sick in the afternoon (remember that frittata?), she blamed it on the restaurant they ate at the night before. On average food poisoning takes two to six hours to affect someone and while eating contaminated food occasionally can take a few days to affect someone, I’d venture to guess it wasn’t the restaurant food that got her and her hubbie both having to make pit stops every ½ hour on the way home, a 5 hour trip, apparently it was not a fun drive back, can’t imagine why. No comment from the peanut gallery on that one because nothing is needed……..
And people wonder why there is so much confusion about is it an Airbnb or a REAL B&B, journalists are not helping. I am not going to cry fake news, because it’s not fake, it’s uneducated. I’ve had over a dozen conversations with journalists doing articles in the past year about B&Bs, the state of the industry and other topics, and to almost every one of them I had to explain the difference between an Airbnb and a REAL actually living and breathing B&B, and it’s sad that it takes that to have to open their eyes. For those that think I have a hard on for Airbnb, please re-read the 6th paragraph down, I don’t but I do have an issue with them not being differentiated from REAL B&Bs, and for large landlords making money at the expensive of people in tight housing markets.
Please, dear Journalists, read up on the difference between an Airbnb and a REAL B&B, talk to some Airbnbs and REAL B&Bs and educate yourself on the difference so you can help educate others, look into some of the state and regional B&B associations many of which have inspection and other standards for their members, confusing the masses is quite frankly not helping anyone and it’s certainly not helping innkeepers who can actually claim the title of innkeeper legally. ☹
com (free but cost to get rid of adds and connect a domain name to it)
org (free but cost for domain name and hosting in order to set it up)
There are many more options out there, but most are have fees.
What kinds of things can you as a Toastmaster or Club can blog or post about:
A recent speech contest (with photos)
A member getting an education award (with photos)
Club meeting minutes
The transcript of a speech (accompanied by an embedded Youtube video)
Member testimonials
Musings on Toastmasters
Advertising an open house
Explaining how a meeting runs or meeting roles
Results of an officer election
Instructional or informational information on Pathways
Member bios and why they joined Toastmasters
Ideas for Speeches
Topics you have heard other Toastmasters cover
Writing about mentoring, being a mentor or a mentee
Advertising a club meeting
About the company or location your meeting is hosted in
Toastmaster challenges or success
Write about a recent interesting meeting or a meeting that had some challenges, be careful with names and how you describe though as feelings can be hurt
The best things you have learned from being evaluated
How you have seen other grow and learn from being in Toastmasters
Leadership lessons learned
Lists of Toastmasters resources
Lists of things that help Toastmasters
Lists in general, top 10 lists are always good posts and best of
The Sky is the limit in terms of what can be written about on a blog
This past January one of the sessions I ran was “In the Kitchen Time Savers”, and I had a slide about compound butters. Interestingly enough, most of the questions I got at the tail end of the session were asking about the butters, I had innkeepers tracking me down after the session to ask about them and innkeepers are still emailing me, the one this morning actually is the one that prompted me to write this up.
What I have been asked about primarily is some suggestions and any tips and tricks I’ve learned over the years. So here goes……
Realistically almost anything can be made into a compound butter, aside from the usual types, you can add finely chopped smoked bacon or diced smoked salmon, lobster butter is also quite lovely, especially on top of a nice omelet or poached egg, also quite good on savory waffles as well. Smoked salmon and dill butter on a sweet potato pancake or waffle is a tasty combination. Method, soften the butter, throw into a mixer, whip, add ingredients, roll into logs, refrigerate and serve.
Using a hot knife to cut the logs is suggested (running under hot water or having a bain marie filled with hot water if you are going to cut a bunch makes it much easier to cut) be sure to wipe the blade down to remove any water first. There are cheese and butter cutters with waffle cuts that can make some fun patterns as well when cutting.
The sky and your imagination are all that hold you back. The one rule of thumb is if something tastes good with butter on it (the exception being a steak, I have tried making a compound butter with it, and it’s “interesting”) it’s generally going to taste good as a compound butter mix.
When in doubt, try micro batches. I prefer using my KitchenAid Mixer to make compounds, but if experimenting, I would use a regular small bowl and spatula to test and just do a tablespoon at a time.
Use unsalted butter to start, add Kosher Salt to taste, I prefer Diamond brand Kosher salt as other Koshers tend to be saltier and textured differently. Even with fruit butter, a pinch of salt brings the flavors out. Using iodized salt in compound butter is just gross, sorry, but it is.
While you can use plastic wrap to make the butter logs, I prefer parchment paper as it makes a more even roll, wrap well in plastic wrap after to ward off refrigerator or freezer odors.
You can set the compound butter in a large square or oval dish and use a butter curler to make individual curls as well, just be sure that any compound butters you are using with a butter curler are smooth, chunky butters like nut or chopped fruit will not curl well. I have also cut out shapes with a cookie cutter, like hearts and stars and reused the leftover butter bits for something else.
Compound butters can be cut from the log and served on a plate as an accompaniment, put in small ramekins to serve or placed directly on your entree or side, they are so versatile and I always found it fun to watch a guest in a dining room ohh and ahh over a lovely roasted pepper compound butter strategically placed on top of their stuffed sole melting slowly down over it. Where oh where was Instagram 20+ years ago?
Toasting any spices in a cast iron past before use (cool down before adding to the butter mix) brings out most flavors.
Fresh Herbs are always the way to go when making compound butters, dried herbs, even if rehydrated, never have the same flavor and the color is not a poppy as well.
I also recommend using fresh garlic and ginger, while powdered does work as well, you will get a better flavor from using fresh ingredients. If you are using a recipe, even one you have developed, taste the garlic or ginger first before adding, I suggest this about most herbs as well. One head of garlic can have a hugely different flavor from another head, that one tablespoon of chopped garlic per one pound of butter may be perfect one time, but overwhelm or underwhelm the next.
If using alcohol or liquors for the compound butters, burning off the alcohol in advance is best, let cool before adding to the mix.
If putting citrus in butters, don’t just use the juice, cut out the supremes (the segments) and chop up and use as well. Tip; using canned mandarin oranges (drain well first) makes excellent citrus butters.
For using other fruits and nuts in butter, puree or finely chop in a food processor before adding them to the whipped butter.
I try to keep most compound butters less then a week, the shelf life will vary depending on the ingredients, if you are making large batches, I’d suggest freezing them (very well wrapped to negate odors) for less than two months. Optimally a month is best. I have kept compound butters In the freezer longer with no ill effects, but again it depends on the ingredients used.
Making homemade butter is always a treat to use as a compound. Because compound butters usually don’t keep for long, the normal shelf life of homemade butter (2-3 weeks) generally doesn’t come into play. I personally love Kate’s Homemade Butter, which I think is one of the best butters out there, I prefer it above even Plugra. Please use a good butter, even if a little more expensive, the flavor makes a difference and guests notice, good ingredients are so important. It’s like cooking with cheap wine, your sauce will taste a million times better if you buy that $13.00 bottle of 19 Crimes Red Blend and use half and drink half vs the $6 cooking wine. It doesn’t have to break the bank just up the game a little.
Keep in mind when making compounds you want to think of the end results and what you intend to do with them, are they to compliment a dish you make frequently? Is it to go on every table daily to accompany muffins that may change flavor daily or scones? Experimenting is fun, but think about when you batch compound butters, is this something you are going to end up with a lot extra of, and even if frozen will it languish in the freezer until you have to throw it out to make room for something else?
These are some of my favorites I’ve made over the years:
Sweet Butters
• Dried Blueberry and Lavender Butter
• Honey Grand Marnier Butter (also good with Toasted Walnuts or Pecans)
• Toasted Pecan and Maple Butter
• Orange Honey Butter
• Ginger and Grapefruit Butter
• Chocolate and Black Pepper Butter
• Dark Chocolate and Toasted Hazelnut Butter
• Blackberry and Sage Butter
• Mango and Ginger Butter (Mango puree works the best for this).
• Dried Cherry and Bourbon Butter
• Strawberry and Toasted Walnut Butter
• Raspberry and Chocolate Mint Butter
• Banana and Cumin Butter (with a touch of honey)
• Cinnamon Maple Butter
• Blueberry and Cardamom Butter
Sweet or Savory
• Reduced Balsamic Butter (or you can cheat and use something like Blaze’s Reduced Balsamic)
• Chocolate Balsamic Butter
• Mexican Chocolate and Chili Butter
• Honey Sriracha Butter
• Red Wine or Port Butter (always reduce the wine or port to a ¼ of its original for the best flavor, I like using Port better as it has a somewhat sweeter final taste, also yummy with some dark cocoa power dashed in)
• Blood Orange and Ginger Butter
• Macha Tea and Ginger Butter
• Roasted Apricot and Thyme Butter
• Pink Peppercorn and Grapefruit Butter
• Roasted (or Grilled) Pear and Agave Butter (Puree the pears in advance or chop very finely)
• Blueberry and Thyme Butter
• Roasted Peach and Mint Butter
• Poppyseed and Lemon Butter
• Fig and Honey Butter
Savory Butters
• Garlic and (any herb) Butter
• Lime and Cilantro Butter
• Honey Mustard and Dill Butter
• Roasted Cerignola Olive and Rosemary Butter
• Chipotle and Smoked Paprika Butter
• Jalapeno, Lime and Cilantro butter
• Lemon and Dill Butter
• Chive and Whole Grain Mustard Butter
• Caramelized Onion or Shallot Butter with Cracked Peppercorns (Peppercorn Melange/Mixed Peppercorns are good in this)
• Gooseberry and Ponzu Butter
• Grilled Eggplant and Basil Butter
• Caper and Tarragon Butter
• Roasted Pepper Butter (Red bells will give you a different flavor and color then yellows and oranges)
• Soy Sauce and Lime Butter (I like Citrus Ponzu, Lime and Ginger Butter as well)
• Smoked Tomato and Garlic Butter
• Roasted garlic (and any herb) Butter
• Black Garlic and Rosemary Butter
• Toasted Sesame and Lime Butter
• Kalamata and garlic butter (I like roasting the olives first as it gives an additional dimension to the flavor.
I could go on as there are hundreds, nay thousands of combinations out there, use your imagination and have fun!
While Facebook is being overwhelmed with fake Facebook profiles, Linkedin is also on the rise. I get, on average, out of the blue about 3-4 Linkedin requests per week, out of those, at least one or two a week are fakes, up from last year when it was about once a month. The Linkedin fakes are a little harder to spot right off the bat, they are on Linkedin, so I would guess the average education level of the spammer/scammers might be a little higher and the copies of messages I have gotten from friends and clients are definitely a lot more sophisticated then the Facebook messages you might get having connected with some “one” on that platform. And I’ve been getting quite a few reports from friends and clients that they are getting lots of odd connection requests.
A question I frequently get from people when I’ve messaged, emailed them or in some case called (especially if it’s a large group of connections that has been hit), is how do you know it’s a fake?
Step one, eyeball the full profile. Generic photo (red flag), the fact they don’t have a banner image in the back is negligible unless they are Linkedin power users or in marketing, many regular Linkedin profile do not add an image. generic text in the bio (red flag), but he has over 500 connections…….
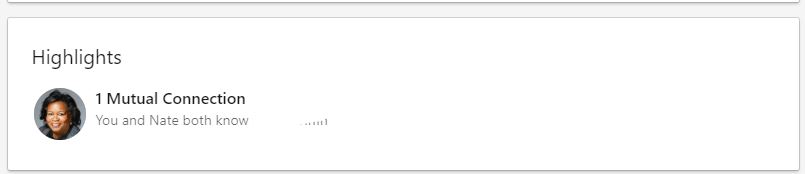
Step two, look for mutual connections and wait ohhhh, we have a mutual connection….. (sometimes more)
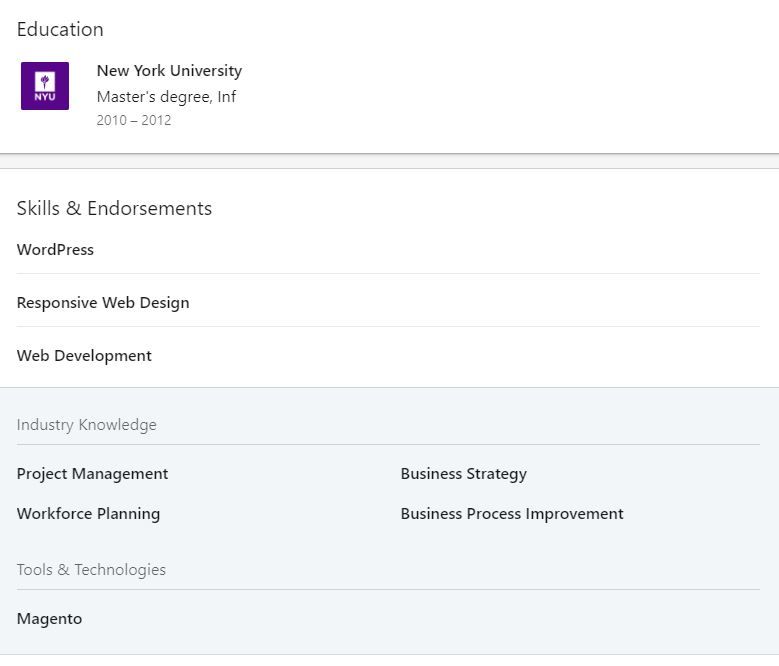
Step Three, look at what they list as experience. Do the companies they list have a Linkedin page for the business (in this case it’s a tech business, so if not, red flag). Google the business listed, in quotes, so in this case “Inhouse design” WordPress web design and “Clean Mate Designing” Websites or Website design. Hmm in this no case no search results for either, tad suspicious no for a web development company? The Third one is a real company, but had live chat on their website, so followed through and asked if he had ever worked there. Not that they recall. I also Google the name and location of the fake profile and in this case got absolutely nothing online, anywhere, no websites, no social media channels, Nada. Sometimes you might get a name hit, but its an appropriated name, so John Doe from Missouri in Healthcare is actually John Doe from Missouri but the real person is a Granite Distributor.
Step Four (in case you were still in doubt when vetting a Linkedin request a this point), Education? “Maybe” I’ve seen schools listed that don’t even actually exist. He (or she) has over 500 connections, but not a single one of them has endorsed them for a skill, that’s a huge red flag.
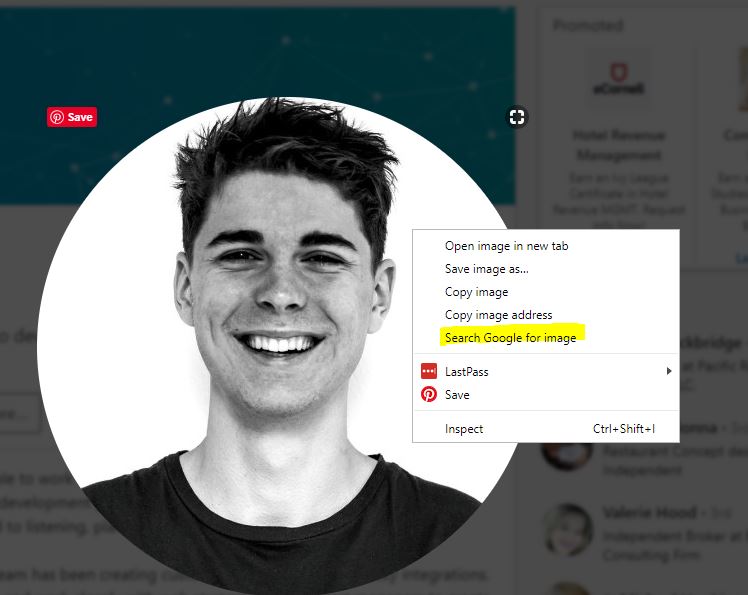
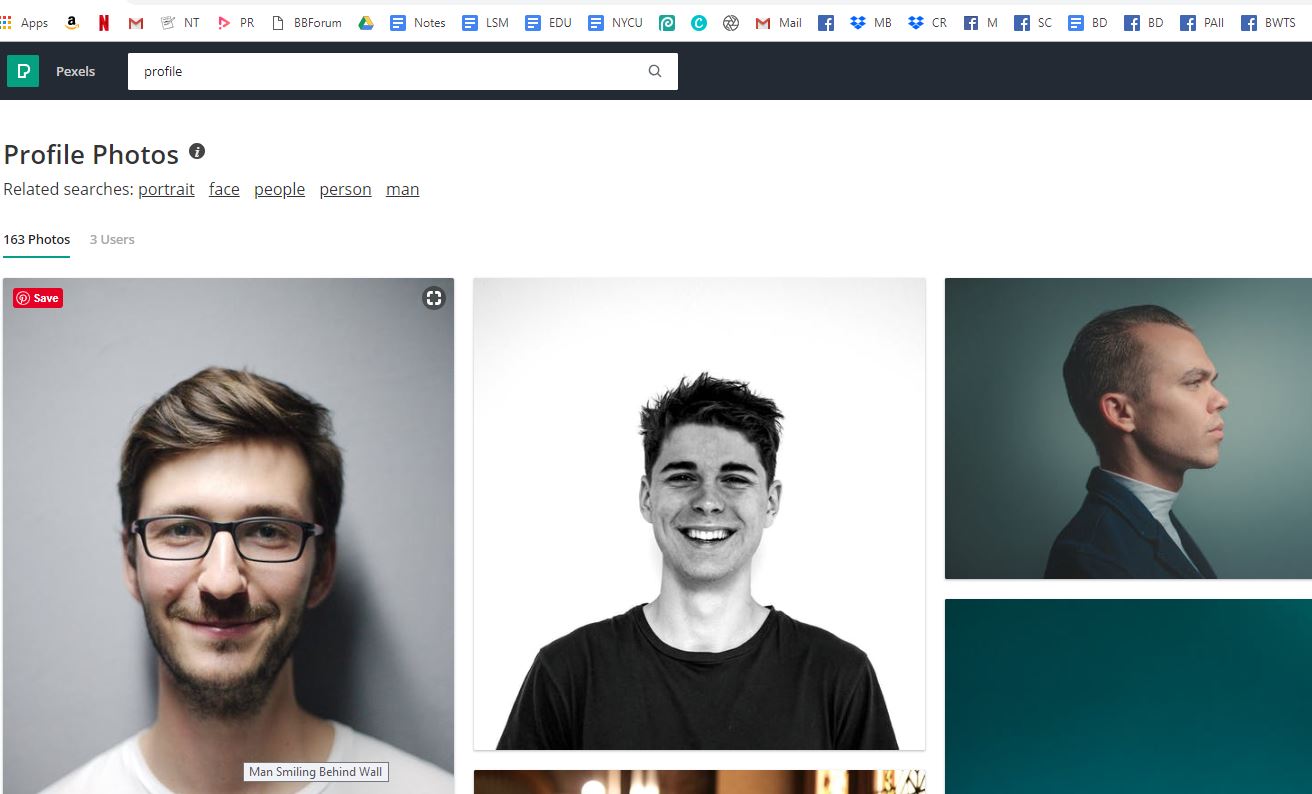
And finally Step Five, reverse search their profile picture, occasionally they are a dead giveaway, I’ve had connection requests from people with Susan Boyle’s photo, Prince Harry and Michelle Pfeiffer, it does seem like most of the fake profiles set up information with Tech information in the bios, but not all. The Susan Boyle one stood out because it said she was a local realtor. Some are posing as Job Headhunters (especially if you list on your profile you are job seeking.)
In this particular case, I tracked the image down to a free stock photo site, sometimes you have to dig a little, but generally they pop right up in search.
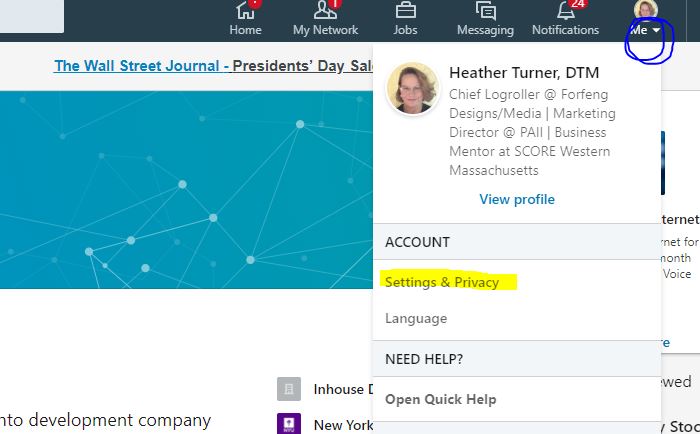
I very much recommend, similar to locking down your friends list on Facebook (even to friends) because once they are connected then they have access, locking down your Linkedin connections, unless you are scrupulous about making sure connection requests are real people, even then unless you are heavily using Linkedin daily, and using it connect with others and facilitate connections, locking it down is a good idea. This is how these people get access, they connect with someone in business and then boom they have access as a connection to see who that person is connected to, and then start sending out connection requests because they know appear as a second degree connection. The same thing happens with Facebook, Billy Joe and Linda Sue are friend/connections so they must be ok.
As I mentioned the messaging is more sophisticated then the Facebook direct messages, frequently offering a special deal or job offers. They are looking to get personal information from you by getting a job application filled out usually with your social security number, or its an investment or buyin scheme requiring you to pay money and get XXXX which never comes through.
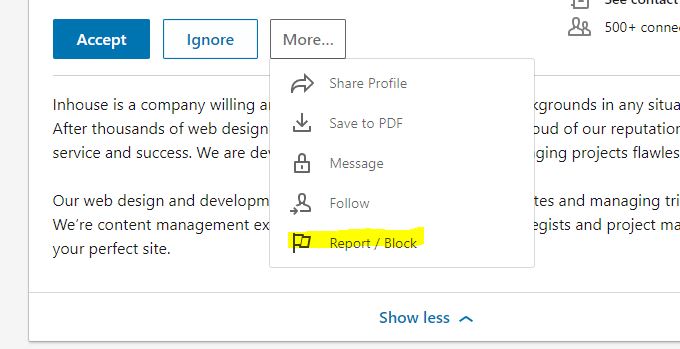
Please report/block these profiles and if you are sure it’s a fake, message anyone you know that is connected to them, most people are not aware the connection is fraudulent and may never have received a direct message from the fake account, they are purely being used as a way to leverage more connection requests. When in doubt, ask your connection if they really know them.
Locking down your connections:
A
And while you are in there, I’d recommend besides locking down connections, go through all your back end settings, especially Account -then- Partners and services -then- Permitted Services and disable any application access that you are not 100% sure is safe. If your Linkedin account is or has been or will be hacked, it’s almost 100% of the time through application access you have granted to your account.
I hope this was helpful, and if you get a Linkedin request that your not totally sure of, please let me know and I’d be happy to take a look.
At a recent innkeeping conference I did a session for innkeepers on protecting themselves and their businesses in terms of computer related things, both online and offline.
Several people asked me if I could share the checklist I had made up and I thought it might make a helpful blog post.
Online Security Checklist Immediate Action: (estimated time to review all-under 2 hours)
Switch Browser to Google Chrome, Safari or Firefox if using Internet Explorer. (1 minute to find, 10 minutes or less to install).
Login to all social media accounts and enable two factor authentications. (10 minutes or less).
Review Important Passwords, change if simple or using things commonly known or easily guessed. (10 minutes or less).
Who is your domain name through? Do you have access? When does it expire? Is the credit card up to date? (10 minutes or less).
Who hosts your website? Is there emergency contact information for it? Is there a website backup, where is it stored and how can it be restored? (10 minutes or less).
Do you have an antivirus program? Is it up to date? (10 minutes or less).
Do you have a malware program? Is it up to date? (10 minutes or less).
Enable program(s) or check to see last time updated, file backups (10 minutes or less).
Check router to see if it needs to be updated/patched, call your cable company if in doubt (10 minutes or less).
Purchase a safe (ETL Verified fire at least 2 hour rated) and other external digital backups (external hard drive and thumb/zip drives) keep offsite with a copy in the safe.
Review and initiate all weekly and monthly To-Dos .
Weekly Security To-Dos: (Under 10 minutes)
Check to make sure antivirus and malware programs are running and up to date.
Make sure computer/tablet/mobile phone operating systems are up to date and patched.
Check to make sure files are being backed-up.
Monthly Security To-Dos: (Under 20 minutes)
Check/Review Installed Browser Plugins (Called Extensions in Safari), disable and delete any you are not 100% sure of. You can always reinstall them later if needed.
Make Sure Internet Browser Is Up to Date.
Check/Review Social Media Channels to see which applications have access to the accounts, disable and delete any you are not 100% sure of. You can always reenable them later if needed.
Review passwords to primary accounts, change and/or rotate.
Make sure computer/tablet/mobile phone operating systems are up to date and patched.
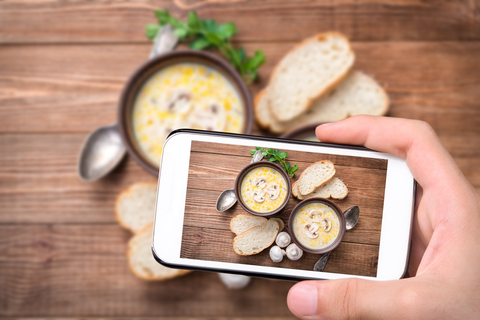
Some quick tips for innkeepers doing DIY photos for websites and social media channels.
Experiment with height and creating different levels. Use a cutting board or other type of portable surface (cake stands, glasses, trays), etc. Adding some texture, like kitchen towels, napkins and kitchen utensils helps break things up and create visual differences between the focus of the photo (the food) and it’s surroundings.
Use Negative Space, have spots in the photo where there is “nothing” makes for better photos. When taking closeup shots, add a little space for background or if it’s on china, for the plate to be a part of the picture, ie half a plate, a corner of the plate.
Use a Tripod For the best photos. If using a smart phone, most full-size tripods or mini tripods now come with, or can be ordered with, smart phone mounts, you just clip your phone right into the mount and shoot away!
Take a ton of photos, don’t take one or two, don’t take a dozen, take several dozen from various angles including straight down. What looks good on a smart phone may not good on a computer when you see it in large resolution. The more photos you take, the more of a chance you will get a couple of “keepers”.
The food is the center point of the photo. Props are nice, but they should complement, not overwhelm the food. Taking photos on white plates is best. A colorful prop can be beautiful, but it can easily be the highlight of the picture and grab attention away from the food it’s supposed to be highlighting,
Garnish is key. Any ingredient can be a garnish and a prop as well, a simple omelet can get “spruced up” by a little chopped parsley or some crumbled cheese and cracked pepper. Simple low prep garnishes are great for food photos. Chopped chives hold up well, as does chopped parsley without browning, crumbled/shredded cheese, chopped or whole nuts, sunflower seeds, ground pepper, chia or poppy seeds, coarse or colored sea salt, chocolate shavings or cocoa powder, coconut flakes, chili flakes, pink peppercorns, dried and fresh berries and fruit. Raid your spice cabinet!
Do your photo editing on a computer, as mentioned prior, a photo may look great on a smartphone, it will look completely different on a big computer and you will be likely to see imperfections and things you won’t notice on a small screen.
Build or buy a lightbox, there are a lot of inexpensive ones on the market and they are quite easy to make as well.
Tips for When Just Doing Food Photos (not photos to serve to guests, best when testing out a new recipe, what better way to utilize it when trying it out, use it to play with some photography shots!)
Use the freshest ingredients, imperfections, even small ones, show up on camera. When specifically doing food “just” for food photos, a leaf of mint “must” be perfect, even small blemishes on fruit show up when in closeups, so heavily eyeball everything.
Don’t cook it all the way, meat, vegetables and fruit all keep cooking (called carryover cooking) when removed from heat. To keep everything look plump and moist, take it out prior to it just being done to shoot it.
Aerosol olive oil sprays, as well as spray bottles with room temperate water can liven up dishes and make them glisten in photos, a spray of fine misted water over fresh herbs and fruit gives it that “just picked” look.
Pro-Photographers Food Styling Tip: Capturing steam on camera is always difficult, placing cotton balls (tampons actually work the best) soaked in hot water behind a coffee or tea cup while snapping photos can give you some nice effects.
Free photo editors – lets you edit all your photos online, from one easy place.
We do have over 400 posts on our old blog, ranging from hospitality management, to recipes, to social media for innkeepers and more. Don't forget to check it out in our archives at https://chefforfeng.wordpress.com.

 Yes, this is a bit of a rant and I won’t apologize for it because this makes me quite angry, actually, it totally fries me. I work with REAL B&Bs, and yes we do encourage B&Bs to list on Airbnb, know and utilize thy frenemy so to speak. It takes less of a commission then the OTAs (Booking.com, Expedia, etc.) among other things. A REAL B&B is one that is licensed, insured and yes inspected (at least in the US) to serve breakfast, many having to take


 A
A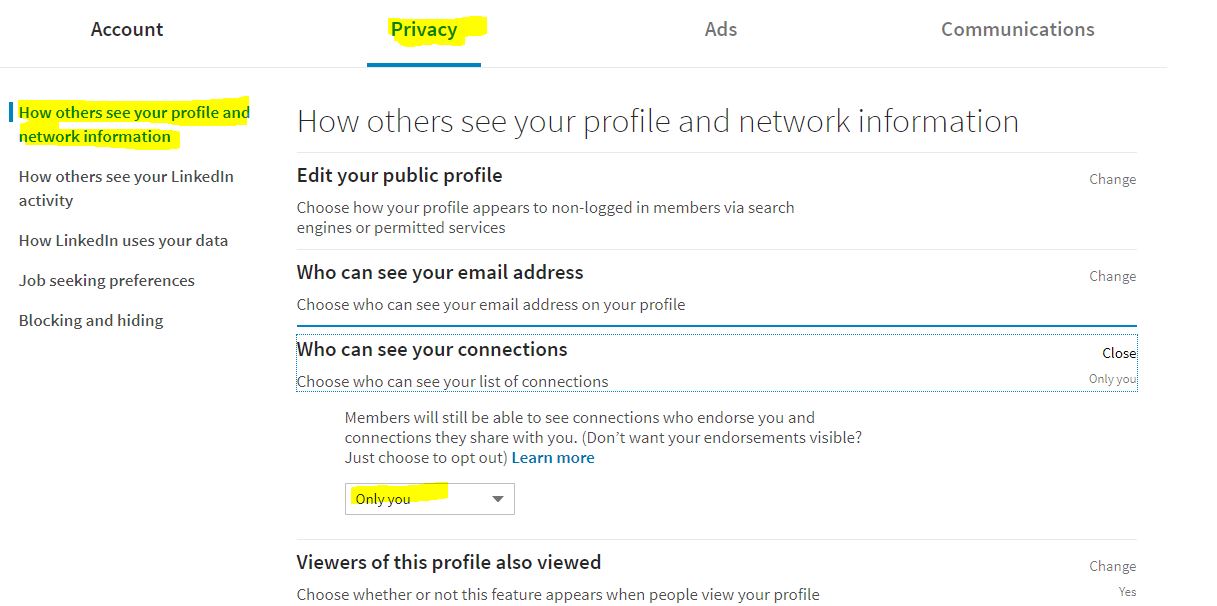
 At a recent innkeeping conference I did a session for innkeepers on protecting themselves and their businesses in terms of computer related things, both online and offline.