
Food Photography Tips for Bed and Breakfasts
Some quick tips for innkeepers doing DIY photos for websites and social media channels.
- Experiment with height and creating different levels. Use a cutting board or other type of portable surface (cake stands, glasses, trays), etc. Adding some texture, like kitchen towels, napkins and kitchen utensils helps break things up and create visual differences between the focus of the photo (the food) and it’s surroundings.
- Use Negative Space, have spots in the photo where there is “nothing” makes for better photos. When taking closeup shots, add a little space for background or if it’s on china, for the plate to be a part of the picture, ie half a plate, a corner of the plate.
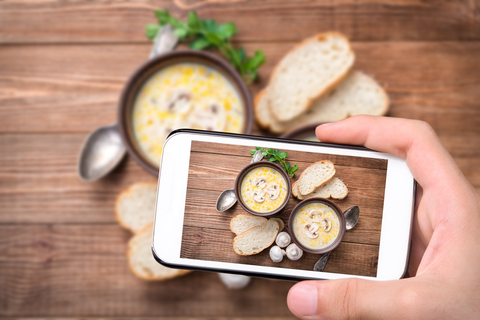
- Use a Tripod For the best photos. If using a smart phone, most full-size tripods or mini tripods now come with, or can be ordered with, smart phone mounts, you just clip your phone right into the mount and shoot away!
- Take a ton of photos, don’t take one or two, don’t take a dozen, take several dozen from various angles including straight down. What looks good on a smart phone may not good on a computer when you see it in large resolution. The more photos you take, the more of a chance you will get a couple of “keepers”.
- The food is the center point of the photo. Props are nice, but they should complement, not overwhelm the food. Taking photos on white plates is best. A colorful prop can be beautiful, but it can easily be the highlight of the picture and grab attention away from the food it’s supposed to be highlighting,
- Garnish is key. Any ingredient can be a garnish and a prop as well, a simple omelet can get “spruced up” by a little chopped parsley or some crumbled cheese and cracked pepper. Simple low prep garnishes are great for food photos. Chopped chives hold up well, as does chopped parsley without browning, crumbled/shredded cheese, chopped or whole nuts, sunflower seeds, ground pepper, chia or poppy seeds, coarse or colored sea salt, chocolate shavings or cocoa powder, coconut flakes, chili flakes, pink peppercorns, dried and fresh berries and fruit. Raid your spice cabinet!
- Do your photo editing on a computer, as mentioned prior, a photo may look great on a smartphone, it will look completely different on a big computer and you will be likely to see imperfections and things you won’t notice on a small screen.
- Build or buy a lightbox, there are a lot of inexpensive ones on the market and they are quite easy to make as well.
Tips for When Just Doing Food Photos (not photos to serve to guests, best when testing out a new recipe, what better way to utilize it when trying it out, use it to play with some photography shots!)
- Use the freshest ingredients, imperfections, even small ones, show up on camera. When specifically doing food “just” for food photos, a leaf of mint “must” be perfect, even small blemishes on fruit show up when in closeups, so heavily eyeball everything.
- Don’t cook it all the way, meat, vegetables and fruit all keep cooking (called carryover cooking) when removed from heat. To keep everything look plump and moist, take it out prior to it just being done to shoot it.
- Aerosol olive oil sprays, as well as spray bottles with room temperate water can liven up dishes and make them glisten in photos, a spray of fine misted water over fresh herbs and fruit gives it that “just picked” look.
Pro-Photographers Food Styling Tip: Capturing steam on camera is always difficult, placing cotton balls (tampons actually work the best) soaked in hot water behind a coffee or tea cup while snapping photos can give you some nice effects.
Free photo editors – lets you edit all your photos online, from one easy place.
- http://www.photoshop.com/tools?wf=editor
- http://pixlr.com/editor/
- http://splashup.com/
- http://www.citrify.com/
- http://www.lunapic.com/editor/
- http://fotoflexer.com/
- https://www.canva.com/ ** (has social media templates for images and banners)
Best Apps for Smartphones:
- https://www.digitaltrends.com/photography/best-camera-apps-for-the-iphone/
- https://www.cnet.com/topics/mobile-apps/best-mobile-apps-android/best-photo-apps-for-android/
How to build an easy lightbox:
- http://www.kiddiefoodies.com/tips/how-to-build-foldable-lightbox
- https://makezine.com/2017/03/23/build-tabletop-light-box/
- https://digital-photography-school.com/how-to-make-a-inexpensive-light-tent/
- Amazon: search for “Light tent” prices range for inexpensive ones from $19.99-$39.99